Table of Contents
Power Recovery & BIOS Settings
All TetherBoxes are pre-configured to automatically power up after a power cut. If your unit isn't doing this, or you're seeing boot errors, this guide will help you resolve the issue.
Note: This guide applies to the TetherBox Pico, TetherBox Giga, and TetherBox Pro. The entry-level TetherBox (2 and 5 channel) does not have a BIOS.
Symptoms
When BIOS settings are reset, you may experience:
- The unit does not automatically power up when plugging in the power cable
- A "Press F1 to Continue" message appears when connecting a monitor
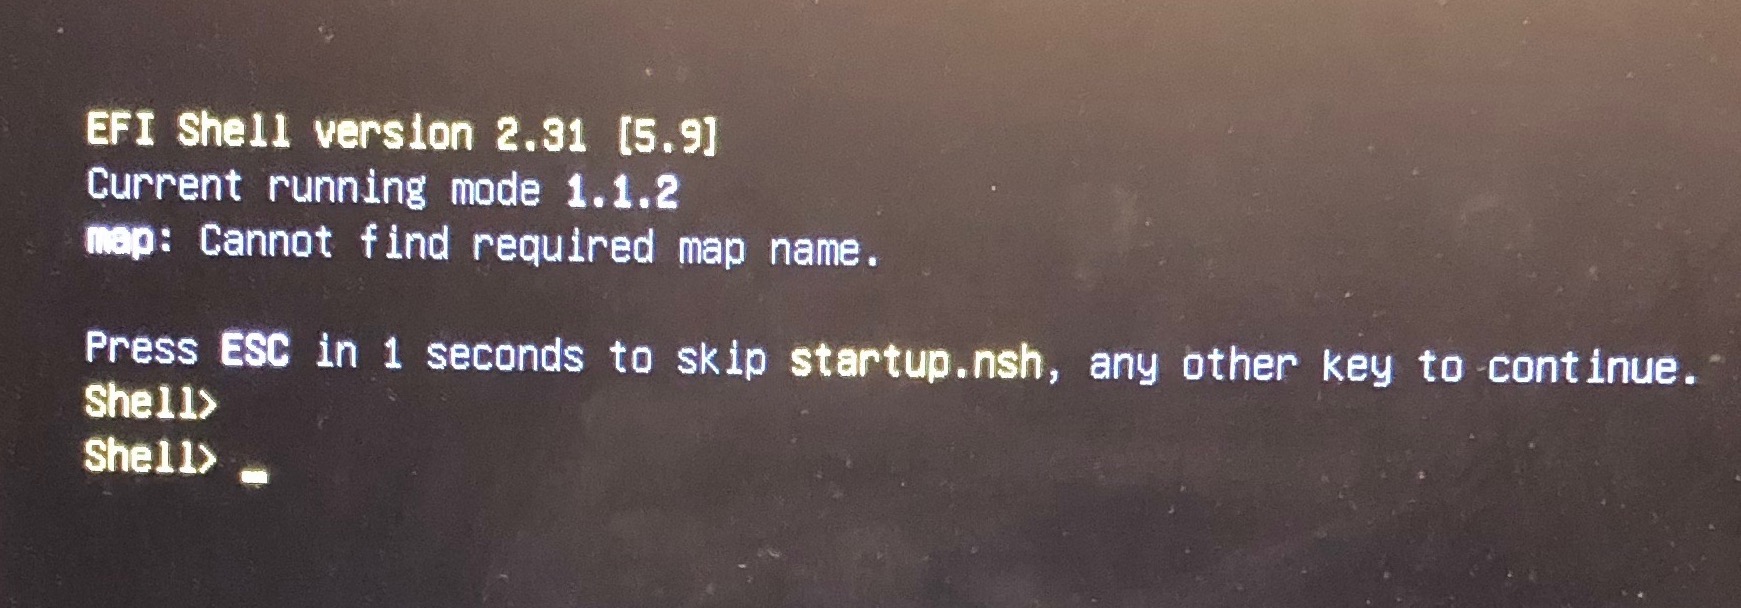
- Boot errors such as "insert boot media" or "cannot find required map":
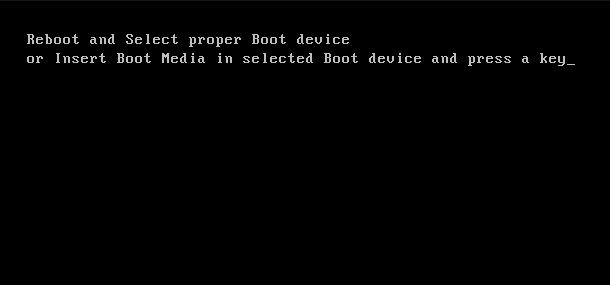
- "Reboot and Select proper Boot device" error:
Why Does This Happen?
| Cause | Description |
|---|---|
| Depleted CMOS battery | The CR2032 button battery inside the unit has gone flat and needs replacing. These batteries typically last 3-7 years depending on usage. Extended periods without mains power drain them faster. |
| Power issues | Frequent power cuts or power surges close together can reset the BIOS configuration. |
| Failed system drive | If reconfiguring the BIOS doesn't restore operation, the internal drive may have failed. Contact TetherX to purchase a replacement pre-loaded drive - see Replacing a TetherBox Drive for installation instructions. |
Configuring Automatic Power-Up
Step 1: Enter the BIOS
- Switch your TetherBox off by holding the power button for 5 seconds
- Connect a display and USB keyboard to your TetherBox
- Switch on and immediately start pressing the Del key (or F2 on some models) until you see the BIOS screen
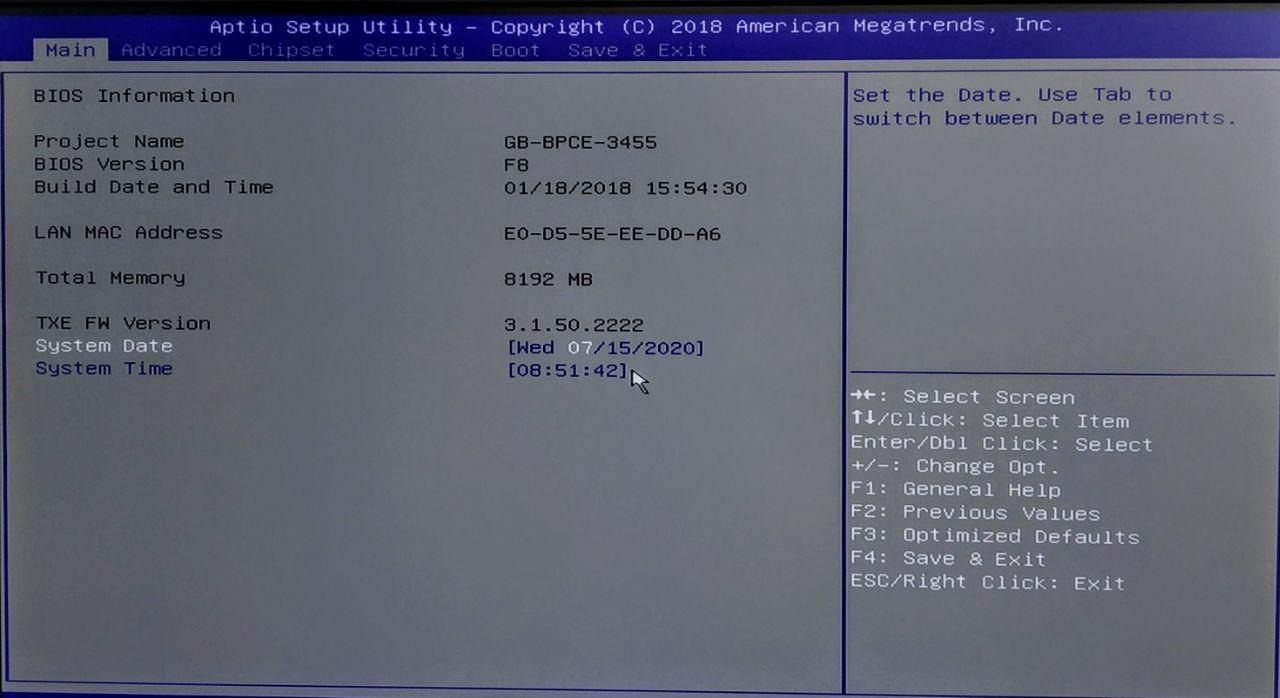
Note: Your BIOS screen may look different depending on the TetherBox generation.
Step 2: Configure Power Recovery
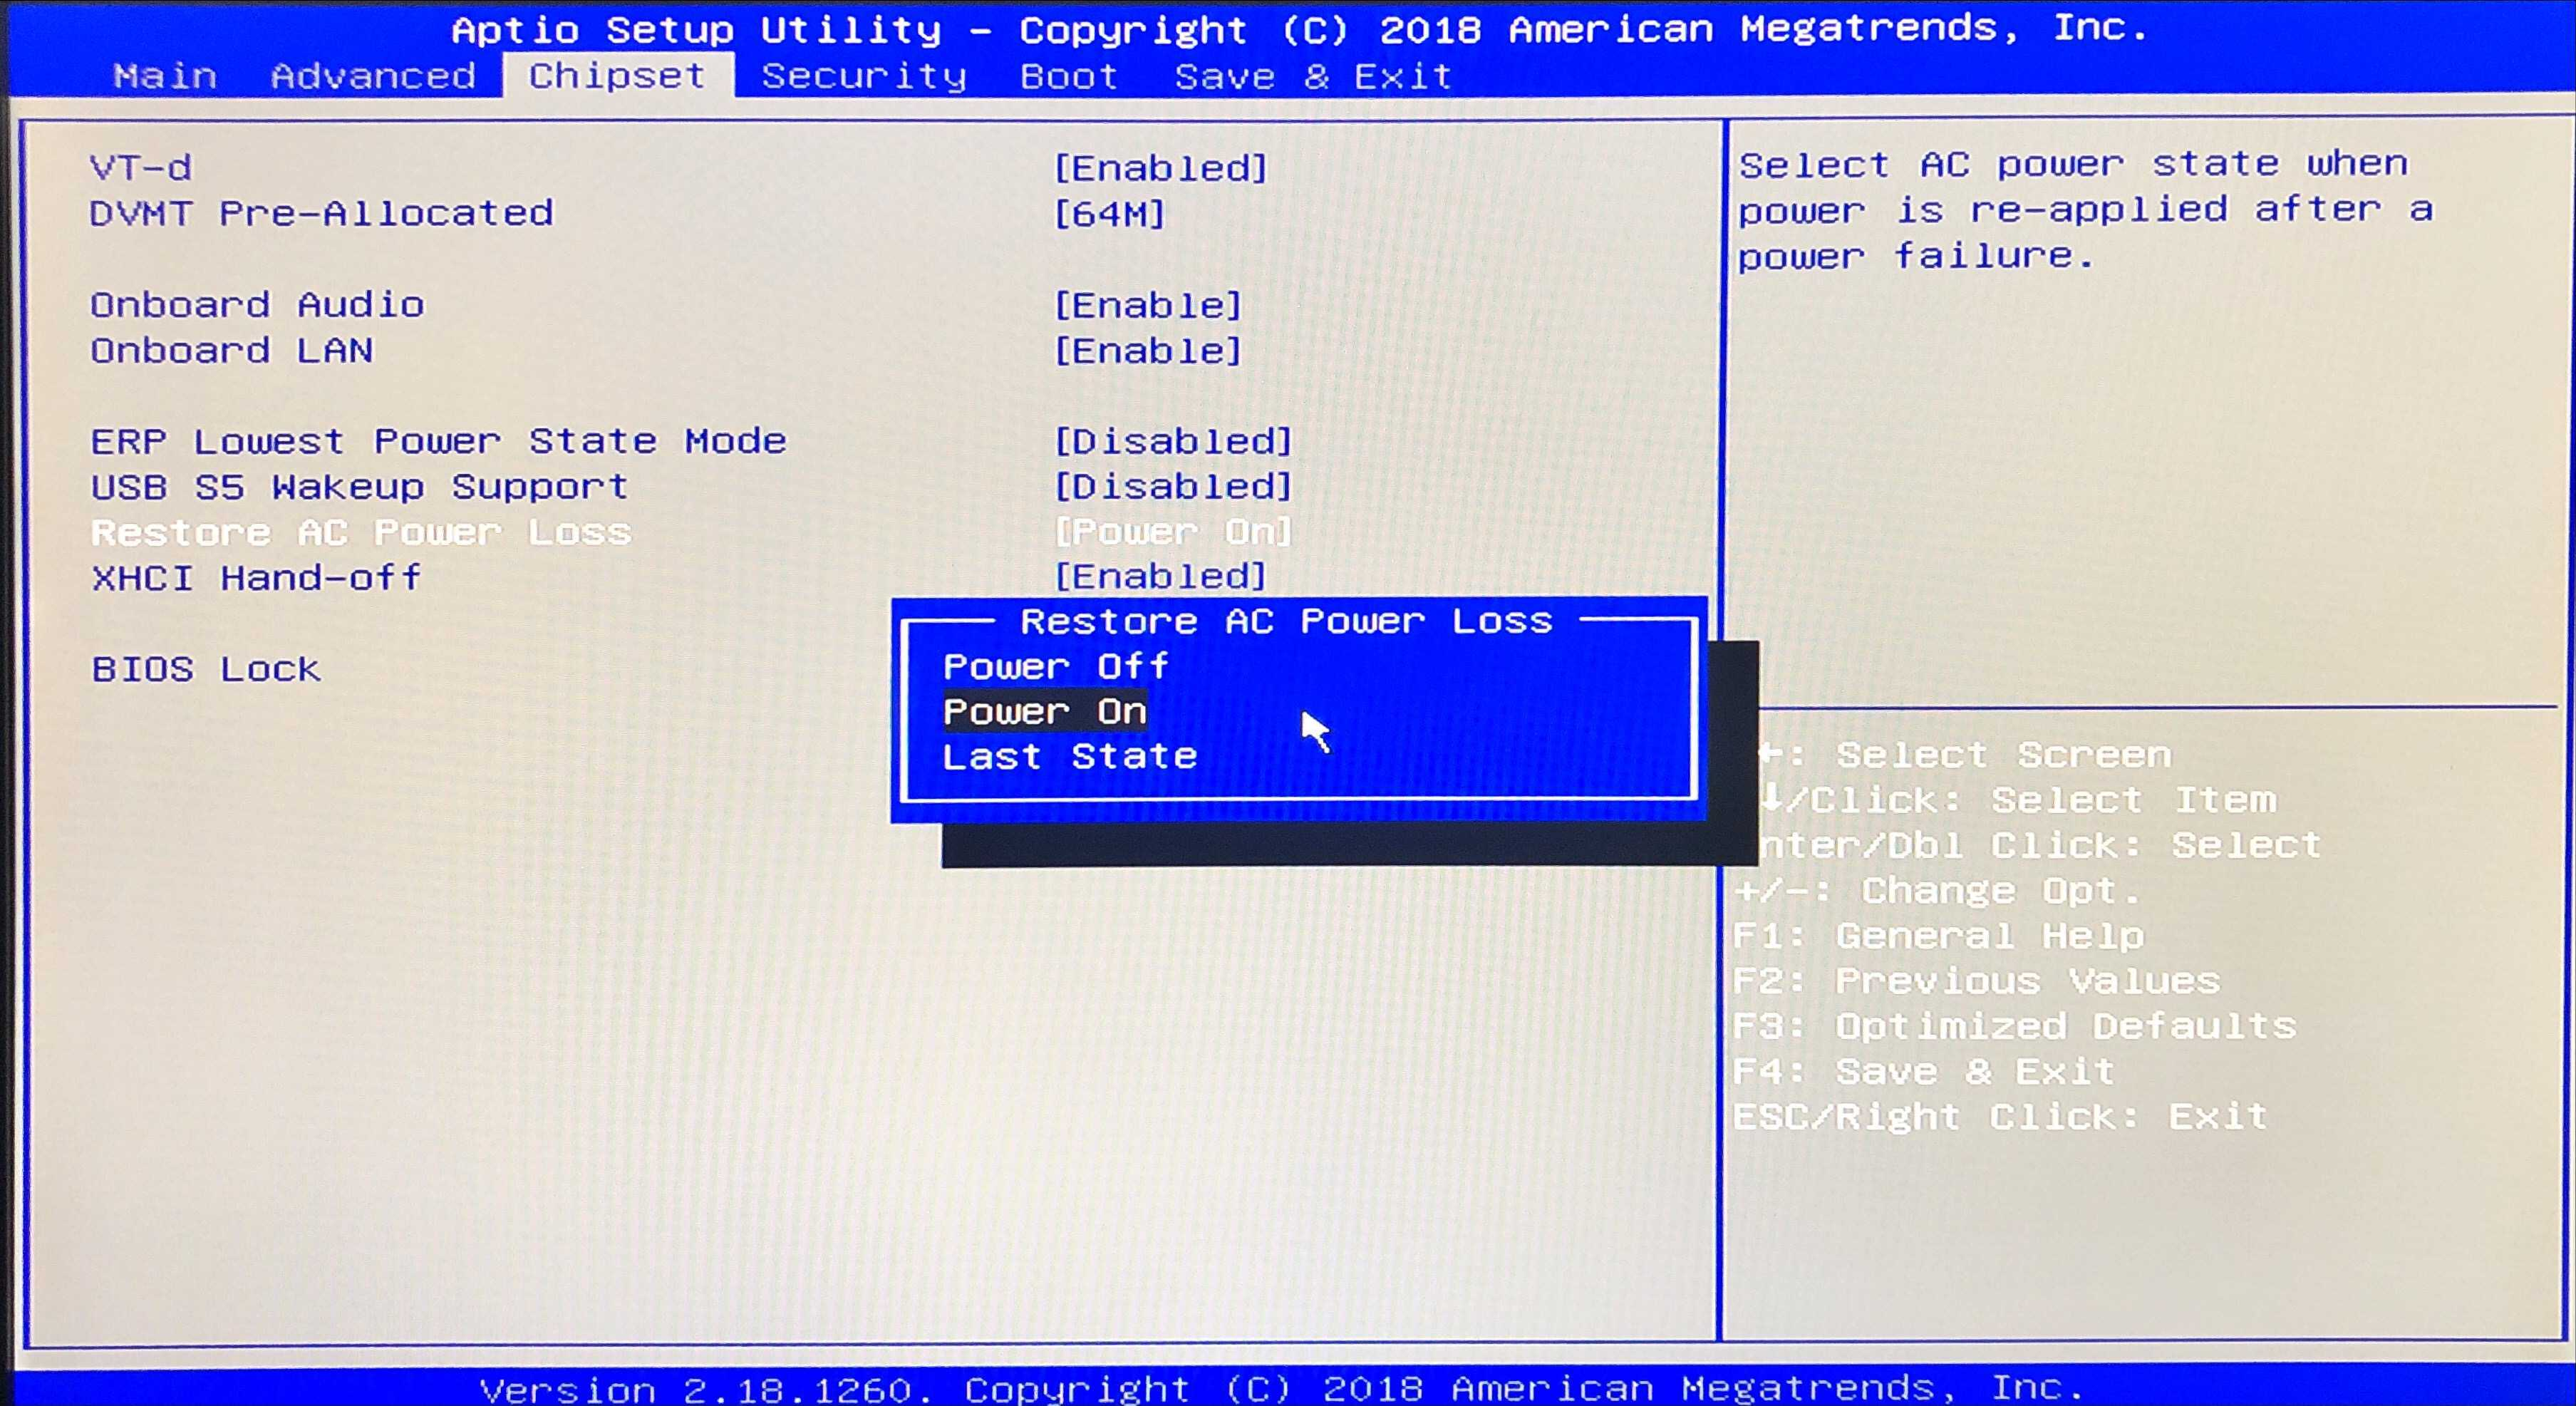
For AMI BIOS (most TetherBox Pico/Giga units):
- Use the arrow keys to navigate to the Chipset tab
- Find Restore AC Power Loss
- Press Enter and select Power On
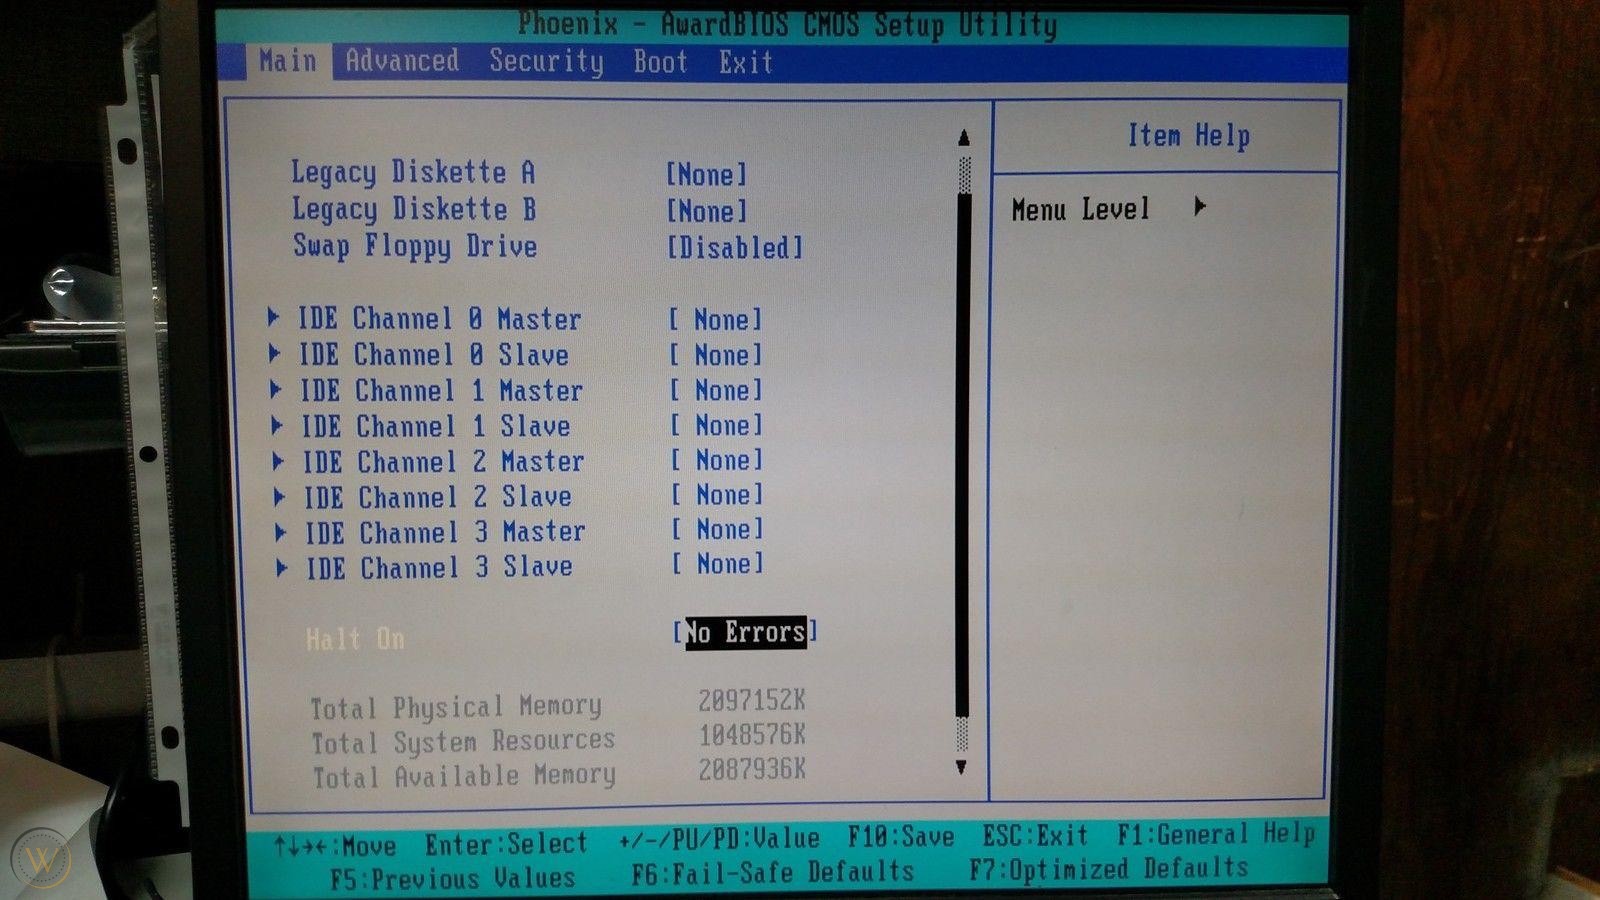
For Phoenix/Award BIOS (older units):
- Navigate to Main tab
- Find Halt On
- Press Enter and select No Errors
Step 3: Save and Exit
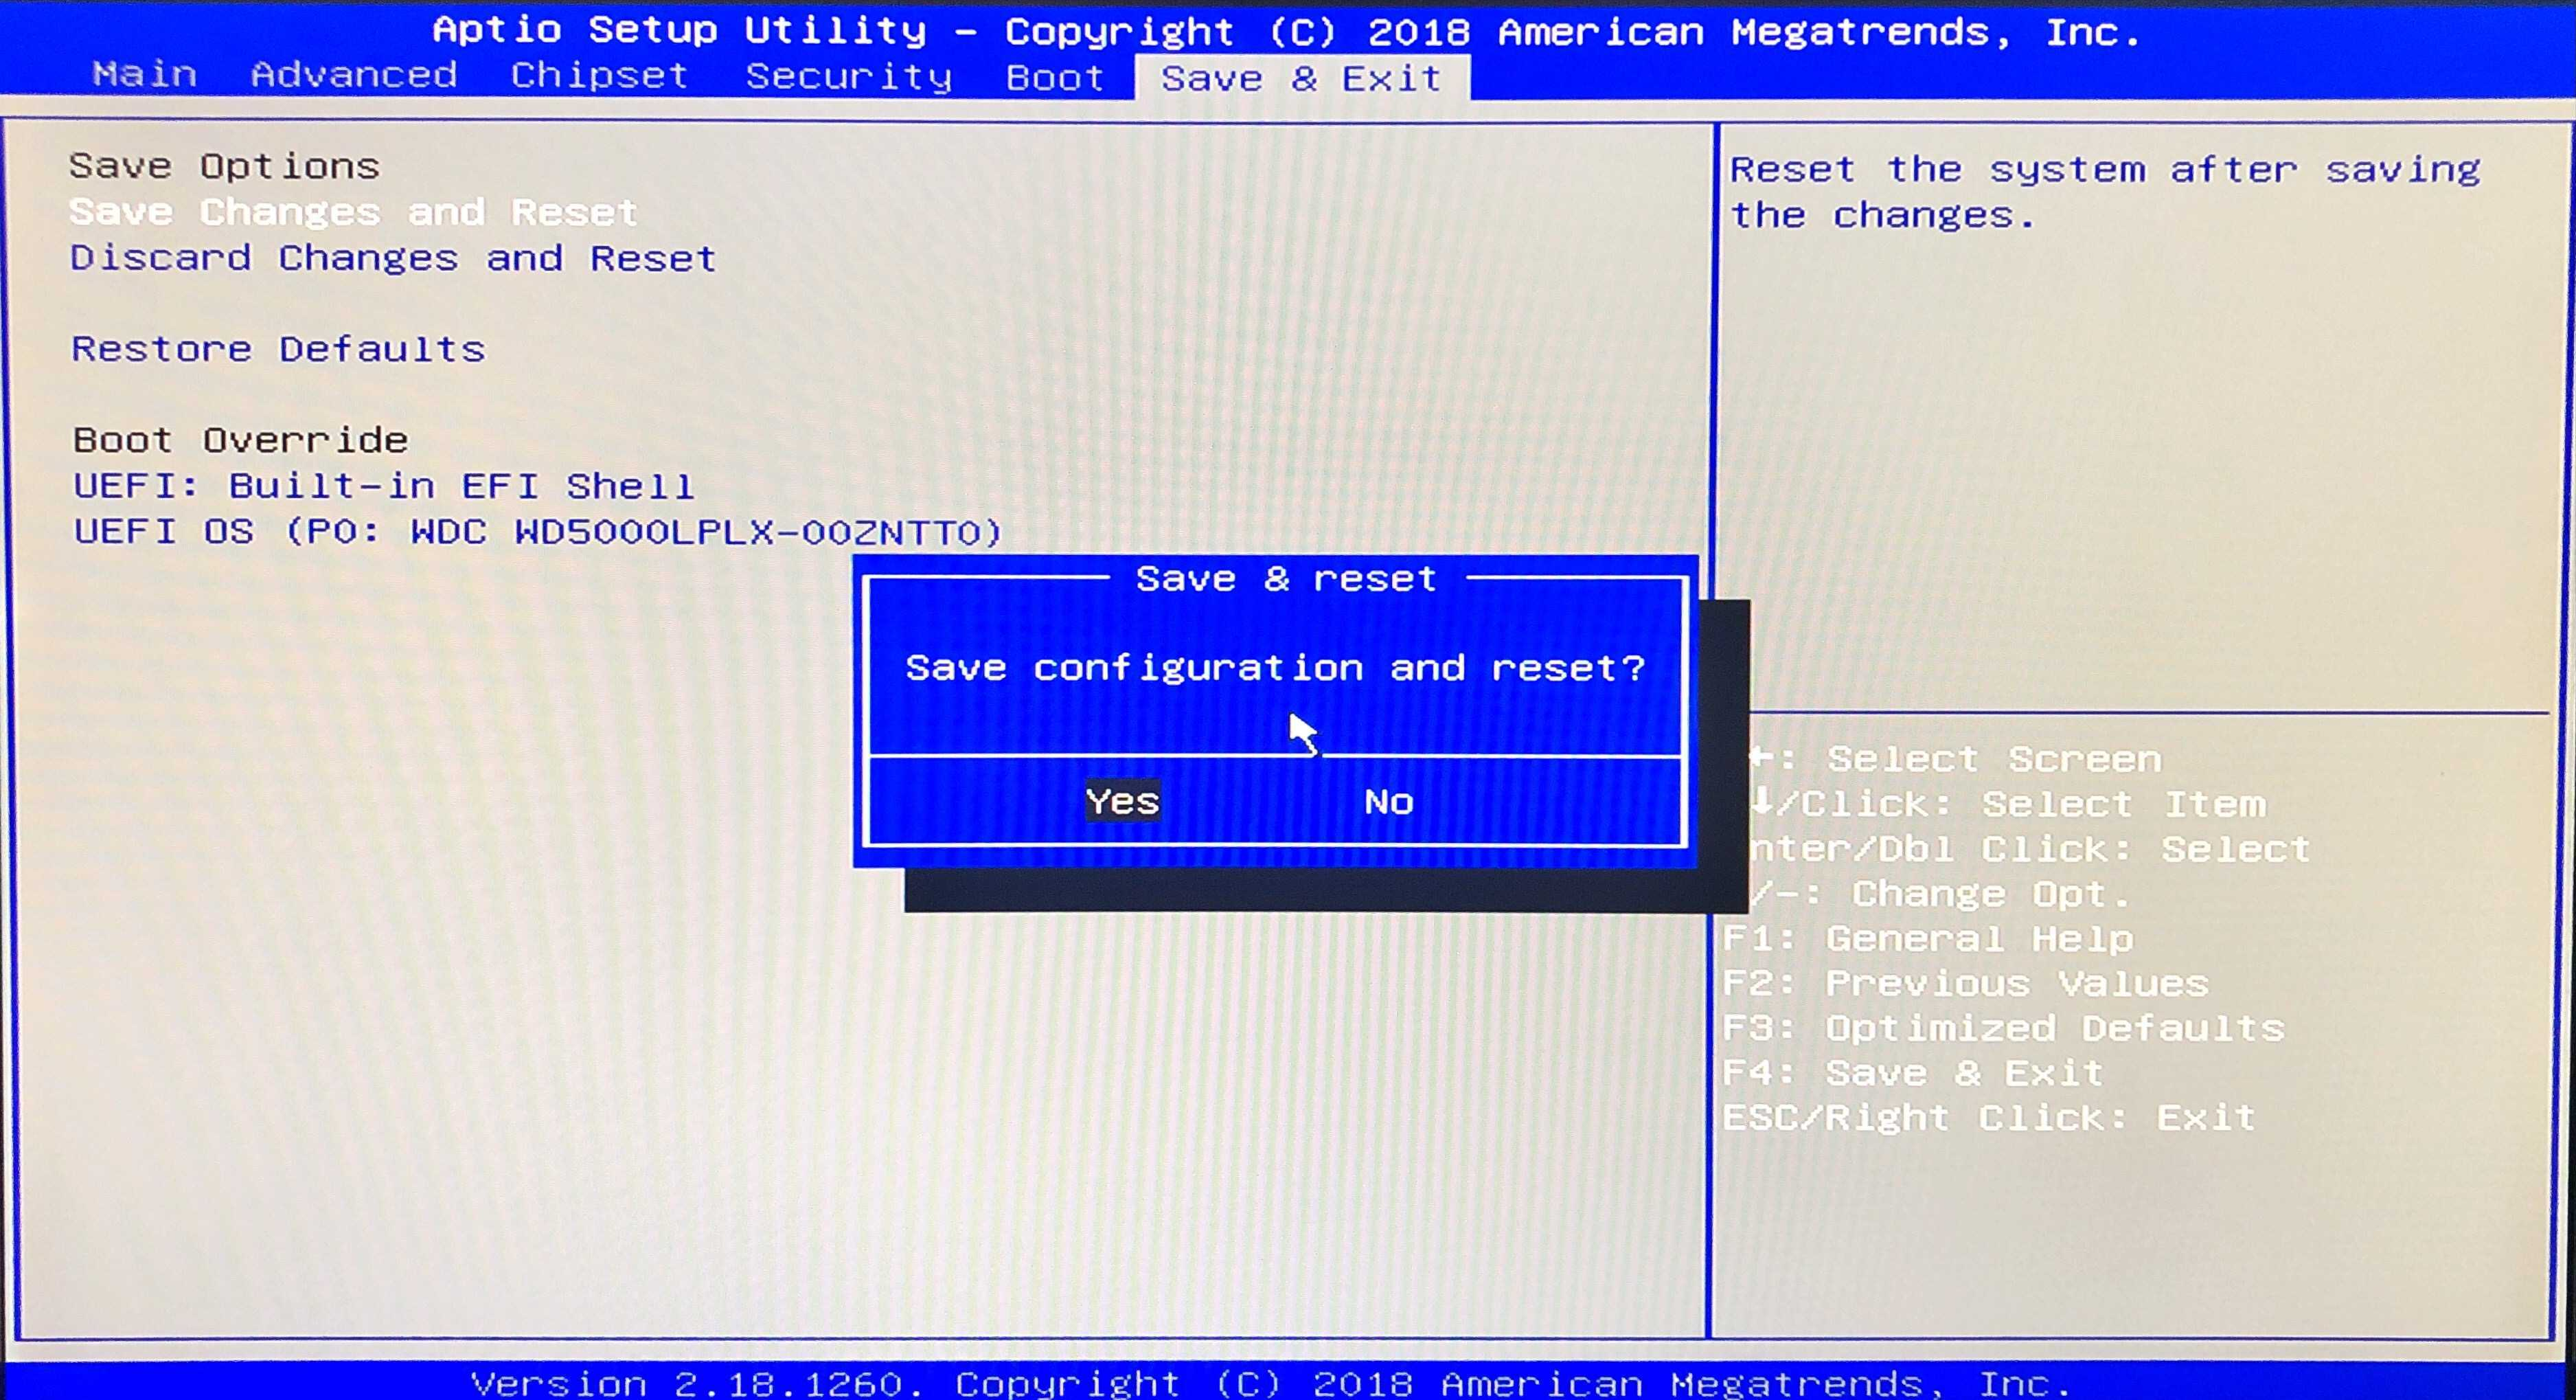
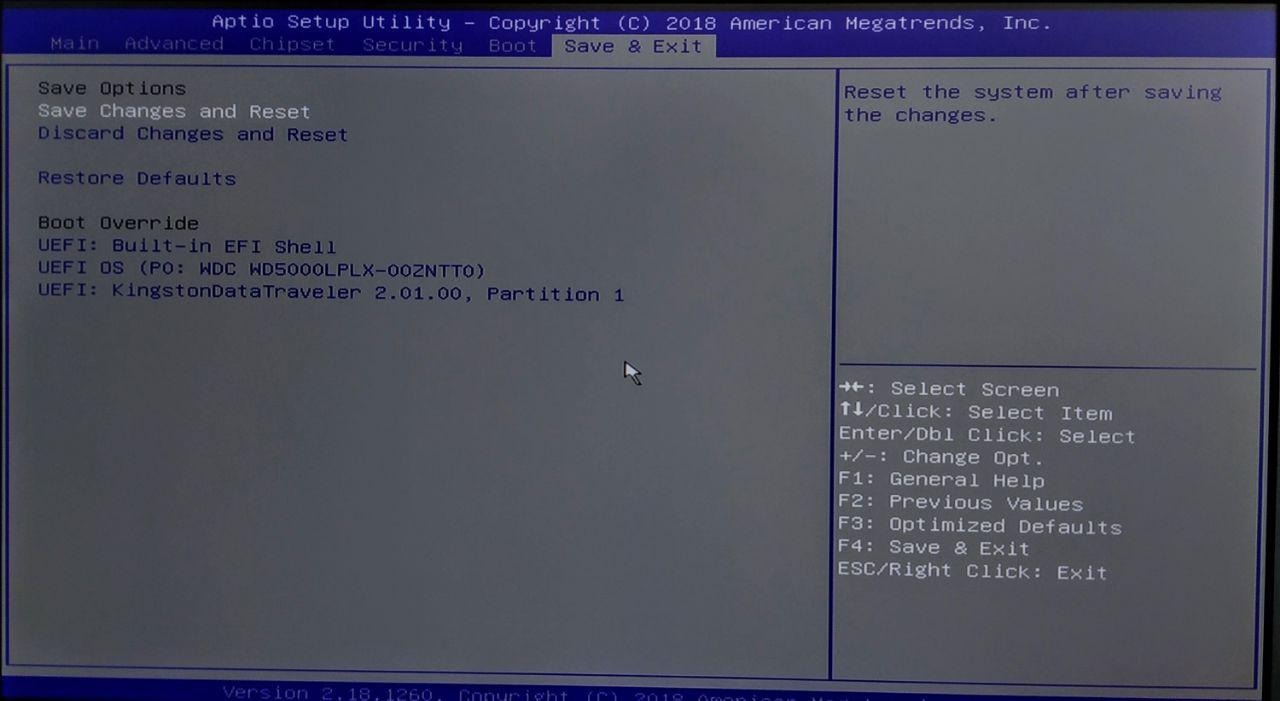
- Press F4 (or navigate to Save & Exit tab)
- Select Save Changes and Reset
- Confirm by selecting Yes
Step 4: Test
- Unplug the power cable from the TetherBox
- Wait 5 seconds
- Plug the power cable back in
- The unit should power up automatically
If the unit does not power up automatically, the CMOS battery likely needs replacing - see below.
Other Recommended BIOS Settings
A TetherBox runs unattended with no keyboard or monitor. While you are in the BIOS, it is worth checking these too. The two most important reliability settings, Restore AC Power Loss and Halt On, are covered in Step 2 above; boot device order is covered in Fixing Boot Device Errors below. The notes here add the settings those steps do not mention.
Reliability
- Halt On on AMI BIOS lives under the Boot tab (on Phoenix/Award it is under Main, as in Step 2). Set it to No Errors. A headless unit set to All Errors stops at POST waiting for a keypress on any minor fault, for example a missing keyboard, and sits dead until someone visits.
- Boot Priority should have Hard Disk as #1, with Removable Device and LAN moved down or off. If Removable is first the unit tries USB on every boot, which is slower and lets a stray USB stick or network boot hijack startup. See Fixing Boot Device Errors for how to change it.
Minor wins
Both are under the Advanced tab:
- Intel AES-NI: Enabled - free CPU crypto acceleration that speeds up VPN and TLS. No downside.
- Intel XD Bit (NX / DEP): Enabled - security hardening. Some kernels expect it.
Boot mode and drive settings
The TetherBox drive is a GPT disk that boots in UEFI mode. Check these and correct them if they are set differently:
- Boot Mode: UEFI (favour UEFI). If the BIOS is forced to Legacy-only, switch it to UEFI or UEFI-with-legacy-fallback. The drive installs its bootloader to the standard removable EFI path, so it boots under UEFI even if the saved boot entry has been lost.
- Secure Boot: Disabled - required. The TetherBox bootloader is not Secure Boot signed, so leaving Secure Boot on will stop the unit booting.
- SATA Mode: AHCI - the standard mode. Only change it if you have been told otherwise for a specific unit.
- TPM and BIOS Write Protect - leave at their current values; there is no need to touch them.
- EIST / Turbo - either value is fine. Idle behaviour is governed by the operating system regardless.
- Power-On by PCIE / LAN / wake - harmless on an always-on unit either way.
Fixing Boot Device Errors
If you see "Reboot and Select proper Boot device" or similar errors, the BIOS may have lost the boot device configuration.
Possible causes:
- Bad connection - Try unplugging and reconnecting the drive cable at both ends
- Failed drive - Contact Support for a replacement pre-loaded drive - see Replacing a TetherBox Drive for installation
- Configuration issue - The BIOS lost the boot device setting (common after CMOS battery depletion or power surges)
Reconfiguring the Boot Device
- Enter the BIOS (press Del or F2 during startup)
- Navigate to the Boot tab
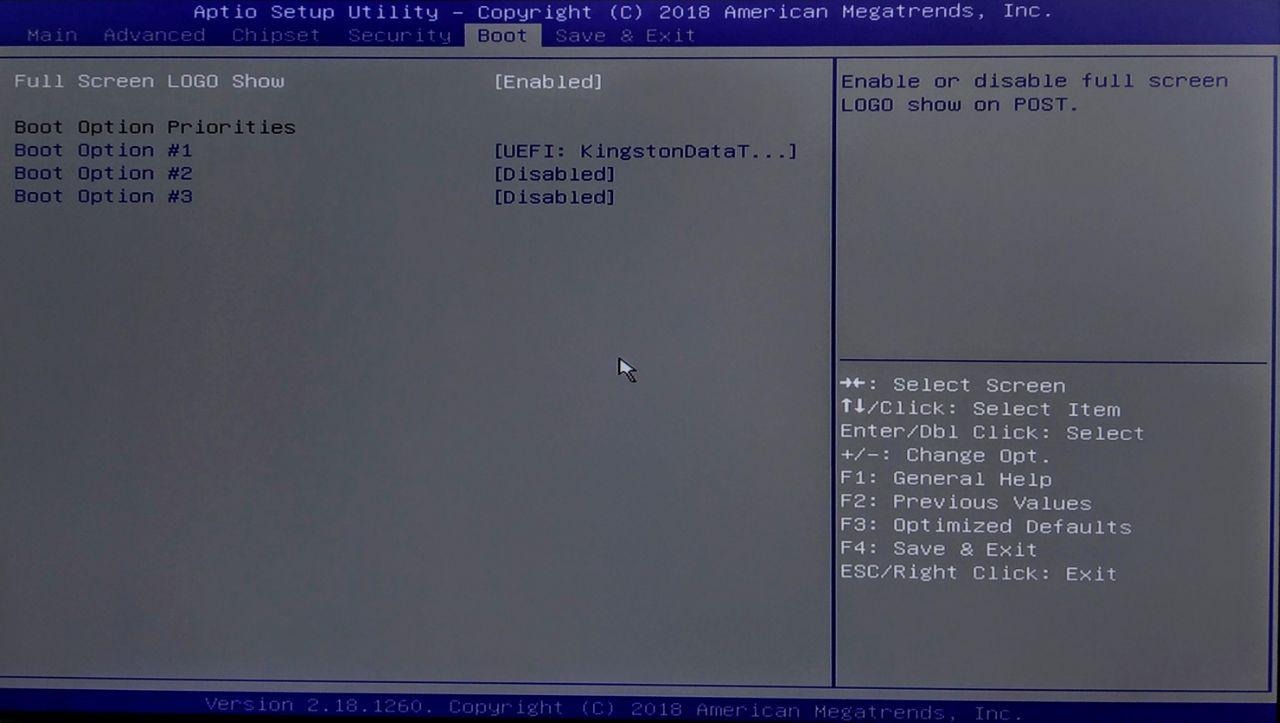
- Select Boot Option #1
- Choose your internal drive from the list (usually shows as the drive model name)
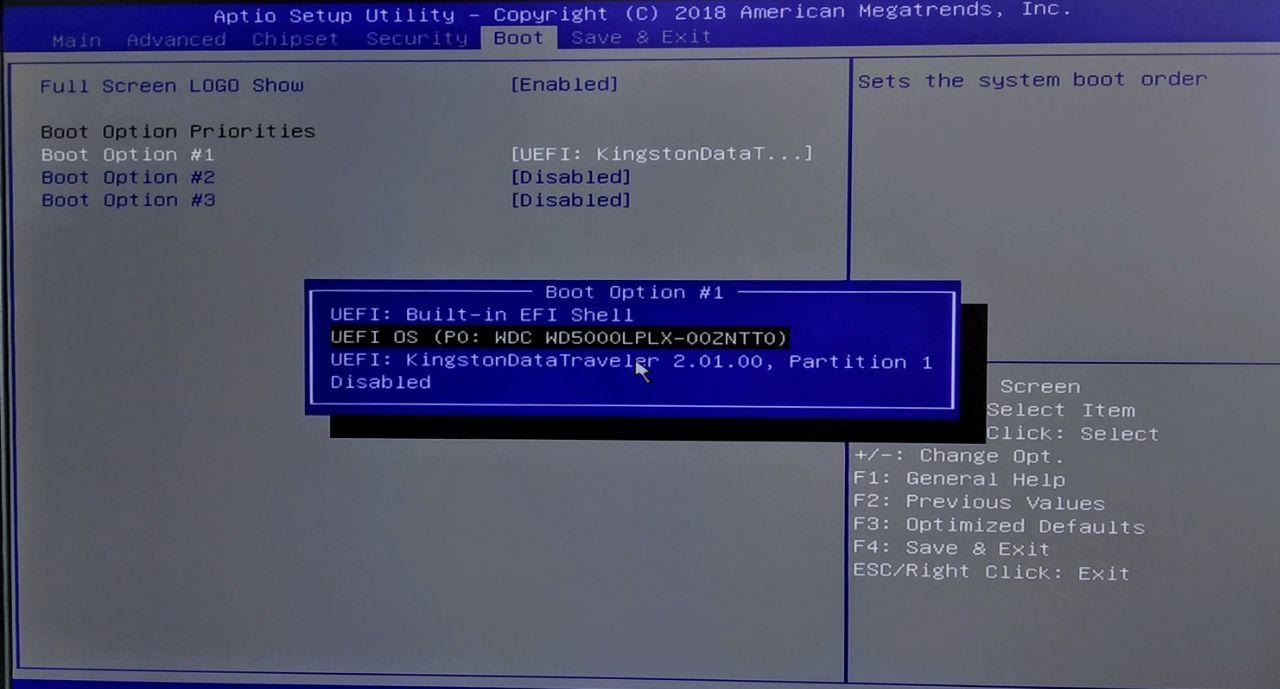
- Go to Save & Exit and select Save Changes and Reset
CMOS Battery Replacement
If the BIOS settings keep resetting after power loss, the CMOS battery needs replacing.
What You Need
- CR2032 button battery - Available from most electronics or watch battery retailers
Locating the Battery
The CMOS battery is a silver coin-cell battery on the motherboard. On TetherBox Pico units (Gigabyte BRIX), it's typically located near the centre of the board:
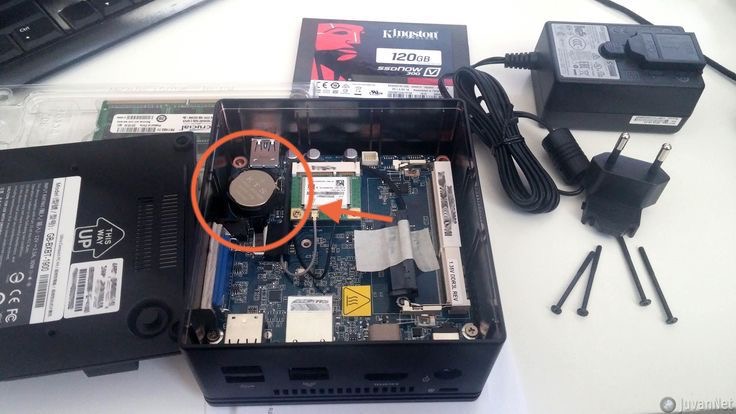
Note: On some units, the battery may be on the underside of the motherboard.
Replacement Steps
- Power off and unplug the TetherBox
- Remove the case screws and open the unit
- Locate the CR2032 battery
- Carefully remove the old battery (note the orientation - positive side up)
- Insert the new battery in the same orientation
- Reassemble the unit
- Reconfigure the BIOS settings as described above
Tip: CMOS batteries typically last 3-7 years. Units left unpowered for extended periods may drain the battery faster.
Still Having Problems?
If these steps don't resolve your issue, contact TetherX support for assistance.
Related Articles
- Replacing a TetherBox Drive - How to install a replacement drive
- TetherBox Troubleshooting - General troubleshooting guide
- Factory Reset - Decommissioning and relocating TetherBoxes
- Remote Power Management - Smart plug integration for automatic power cycling
Referenced in:

