Table of Contents
Running TetherBox in VirtualBox
You can run the TetherBox software on an ordinary x86 PC or server as a virtual machine, using the TetherBox appliance image (an .ova file) inside Oracle VirtualBox. This is useful when you already have a spare machine and would rather not deploy dedicated hardware.
The appliance ships ready to run: Ubuntu with the full TetherBox stack, 4 virtual CPUs, 4 GB of RAM, and EFI firmware. Once it boots it connects to the TetherX platform automatically, exactly like a physical unit. Two settings need adjusting for a real deployment, both covered below: bridged networking (so it can see your cameras) and an extra disk (so it has somewhere to record).
Before you start: You need a 64-bit host with hardware virtualisation (Intel VT-x or AMD-V) enabled in the BIOS, and enough free RAM and disk for the VM. A wired network connection on the host is strongly recommended, see the networking section for why.
1. Install VirtualBox
Download and install Oracle VirtualBox for your host operating system (Windows, macOS, or Linux) from the official site:
Install it with the default options and reboot if prompted. You do not need the Extension Pack, the appliance uses only features included in the base package.
2. Import the Appliance
- Open VirtualBox.
- Go to File menu, then Import Appliance...
- Click the folder icon and select the TetherBox
.ovafile you were supplied. - Click Next. VirtualBox shows the appliance settings (CPU, RAM, disk). Leave these at their defaults unless you have a specific reason to change them.
- Click Finish and wait for the import to complete. A new virtual machine appears in your VirtualBox list.
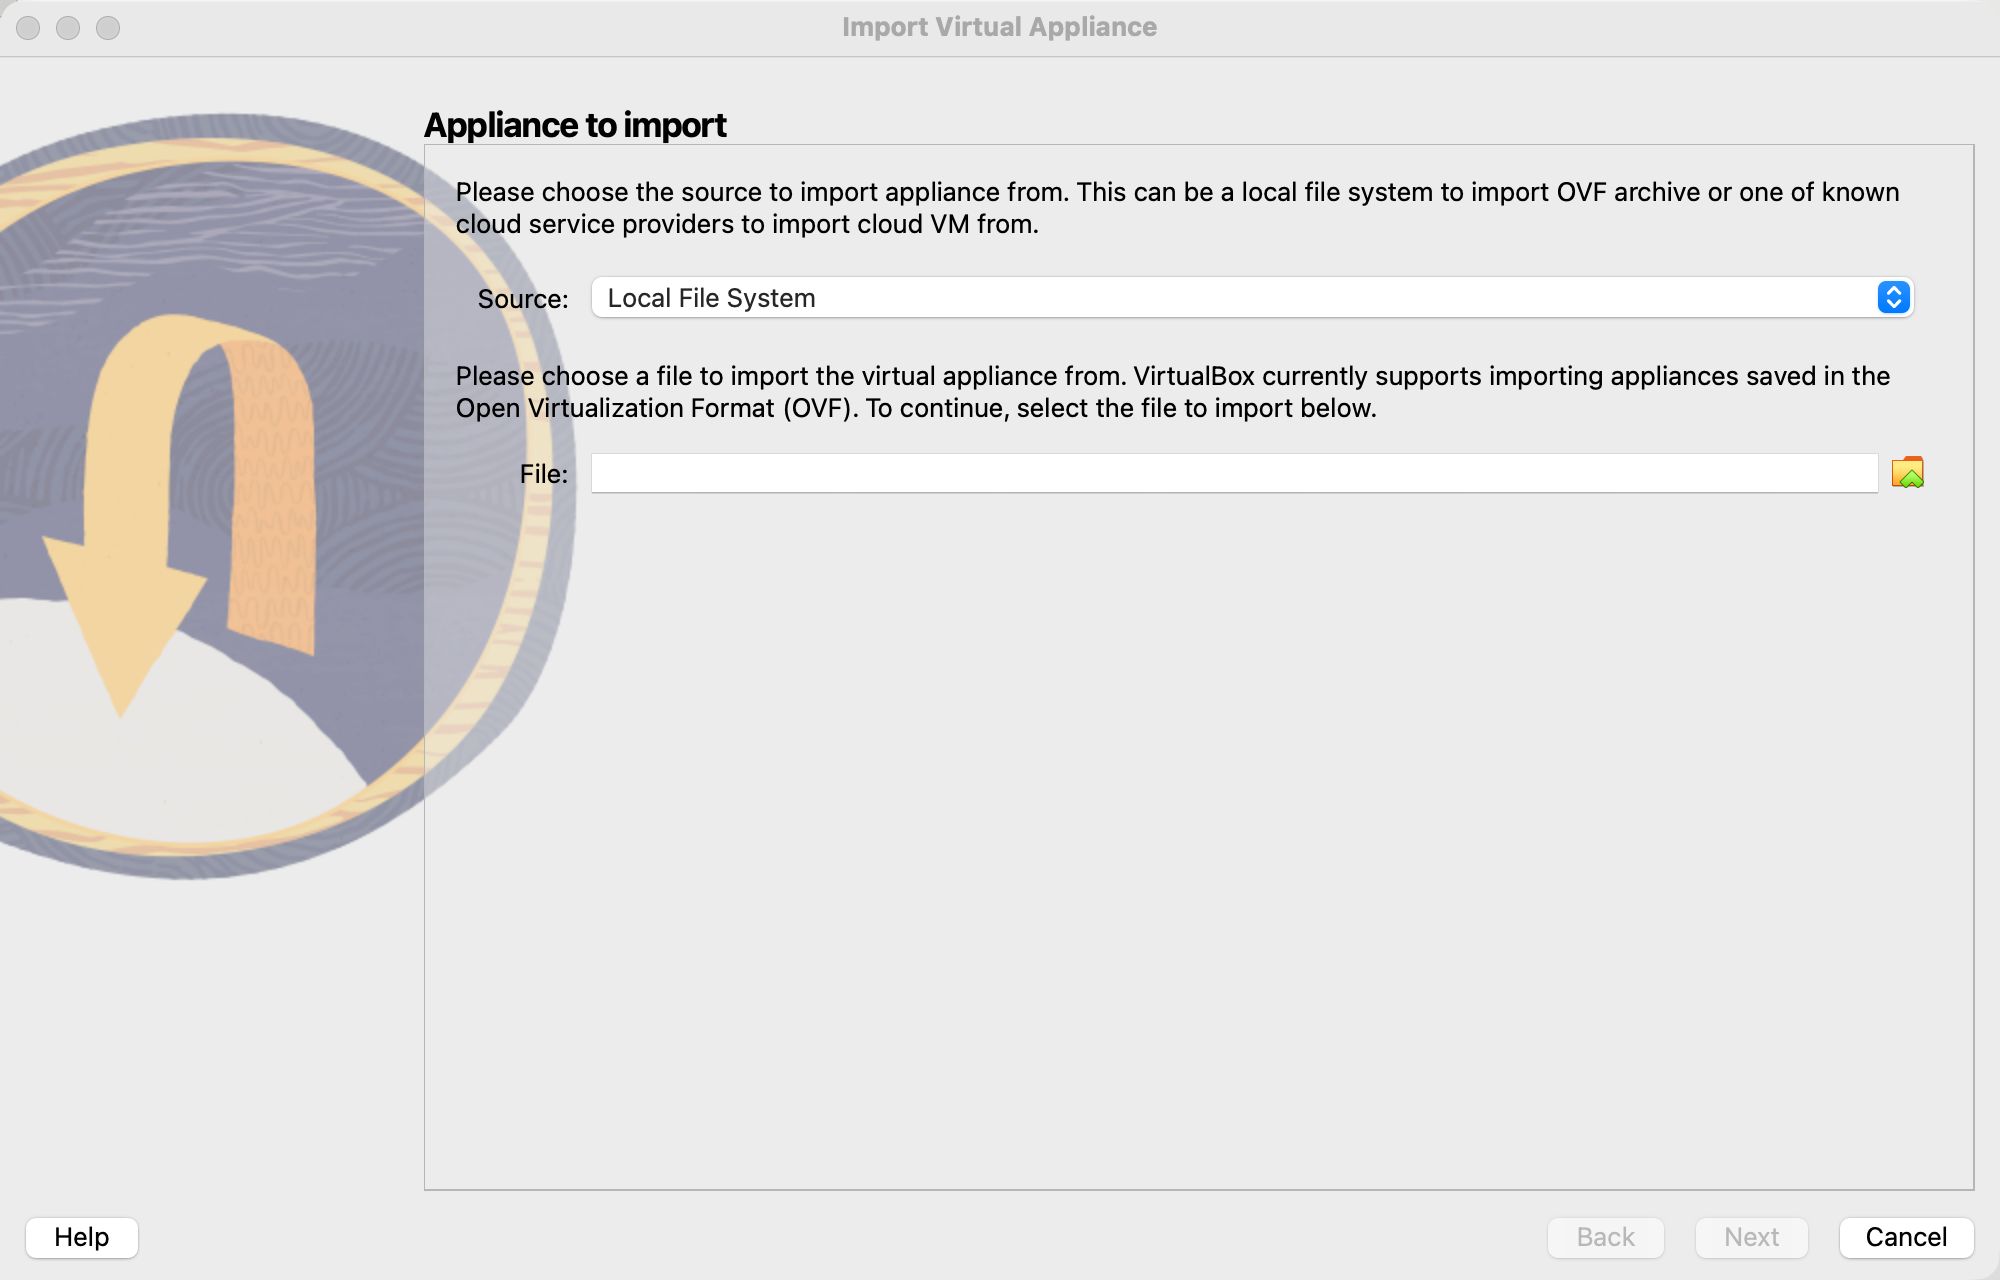
Do not start the machine yet. Change the network and storage settings first, while the machine is powered off.
3. Switch Networking to Bridged Mode
Out of the box the appliance uses NAT networking. NAT always boots and reaches the internet, so the box will come online, but it is hidden behind VirtualBox's own private network and cannot see the cameras and devices on your LAN. The TetherBox discovers cameras by scanning the local network (WS-Discovery multicast and ARP sweeps), which only works when the VM sits directly on your physical network. Bridged mode gives the VM its own IP address on your LAN, so discovery and camera streaming work.
With the machine powered off:
- Select the TetherBox VM, then click Settings.
- Go to the Network tab.
- For Adapter 1, change Attached to: from NAT to Bridged Adapter.
- In Name, select your host's wired network adapter.
- Click OK.
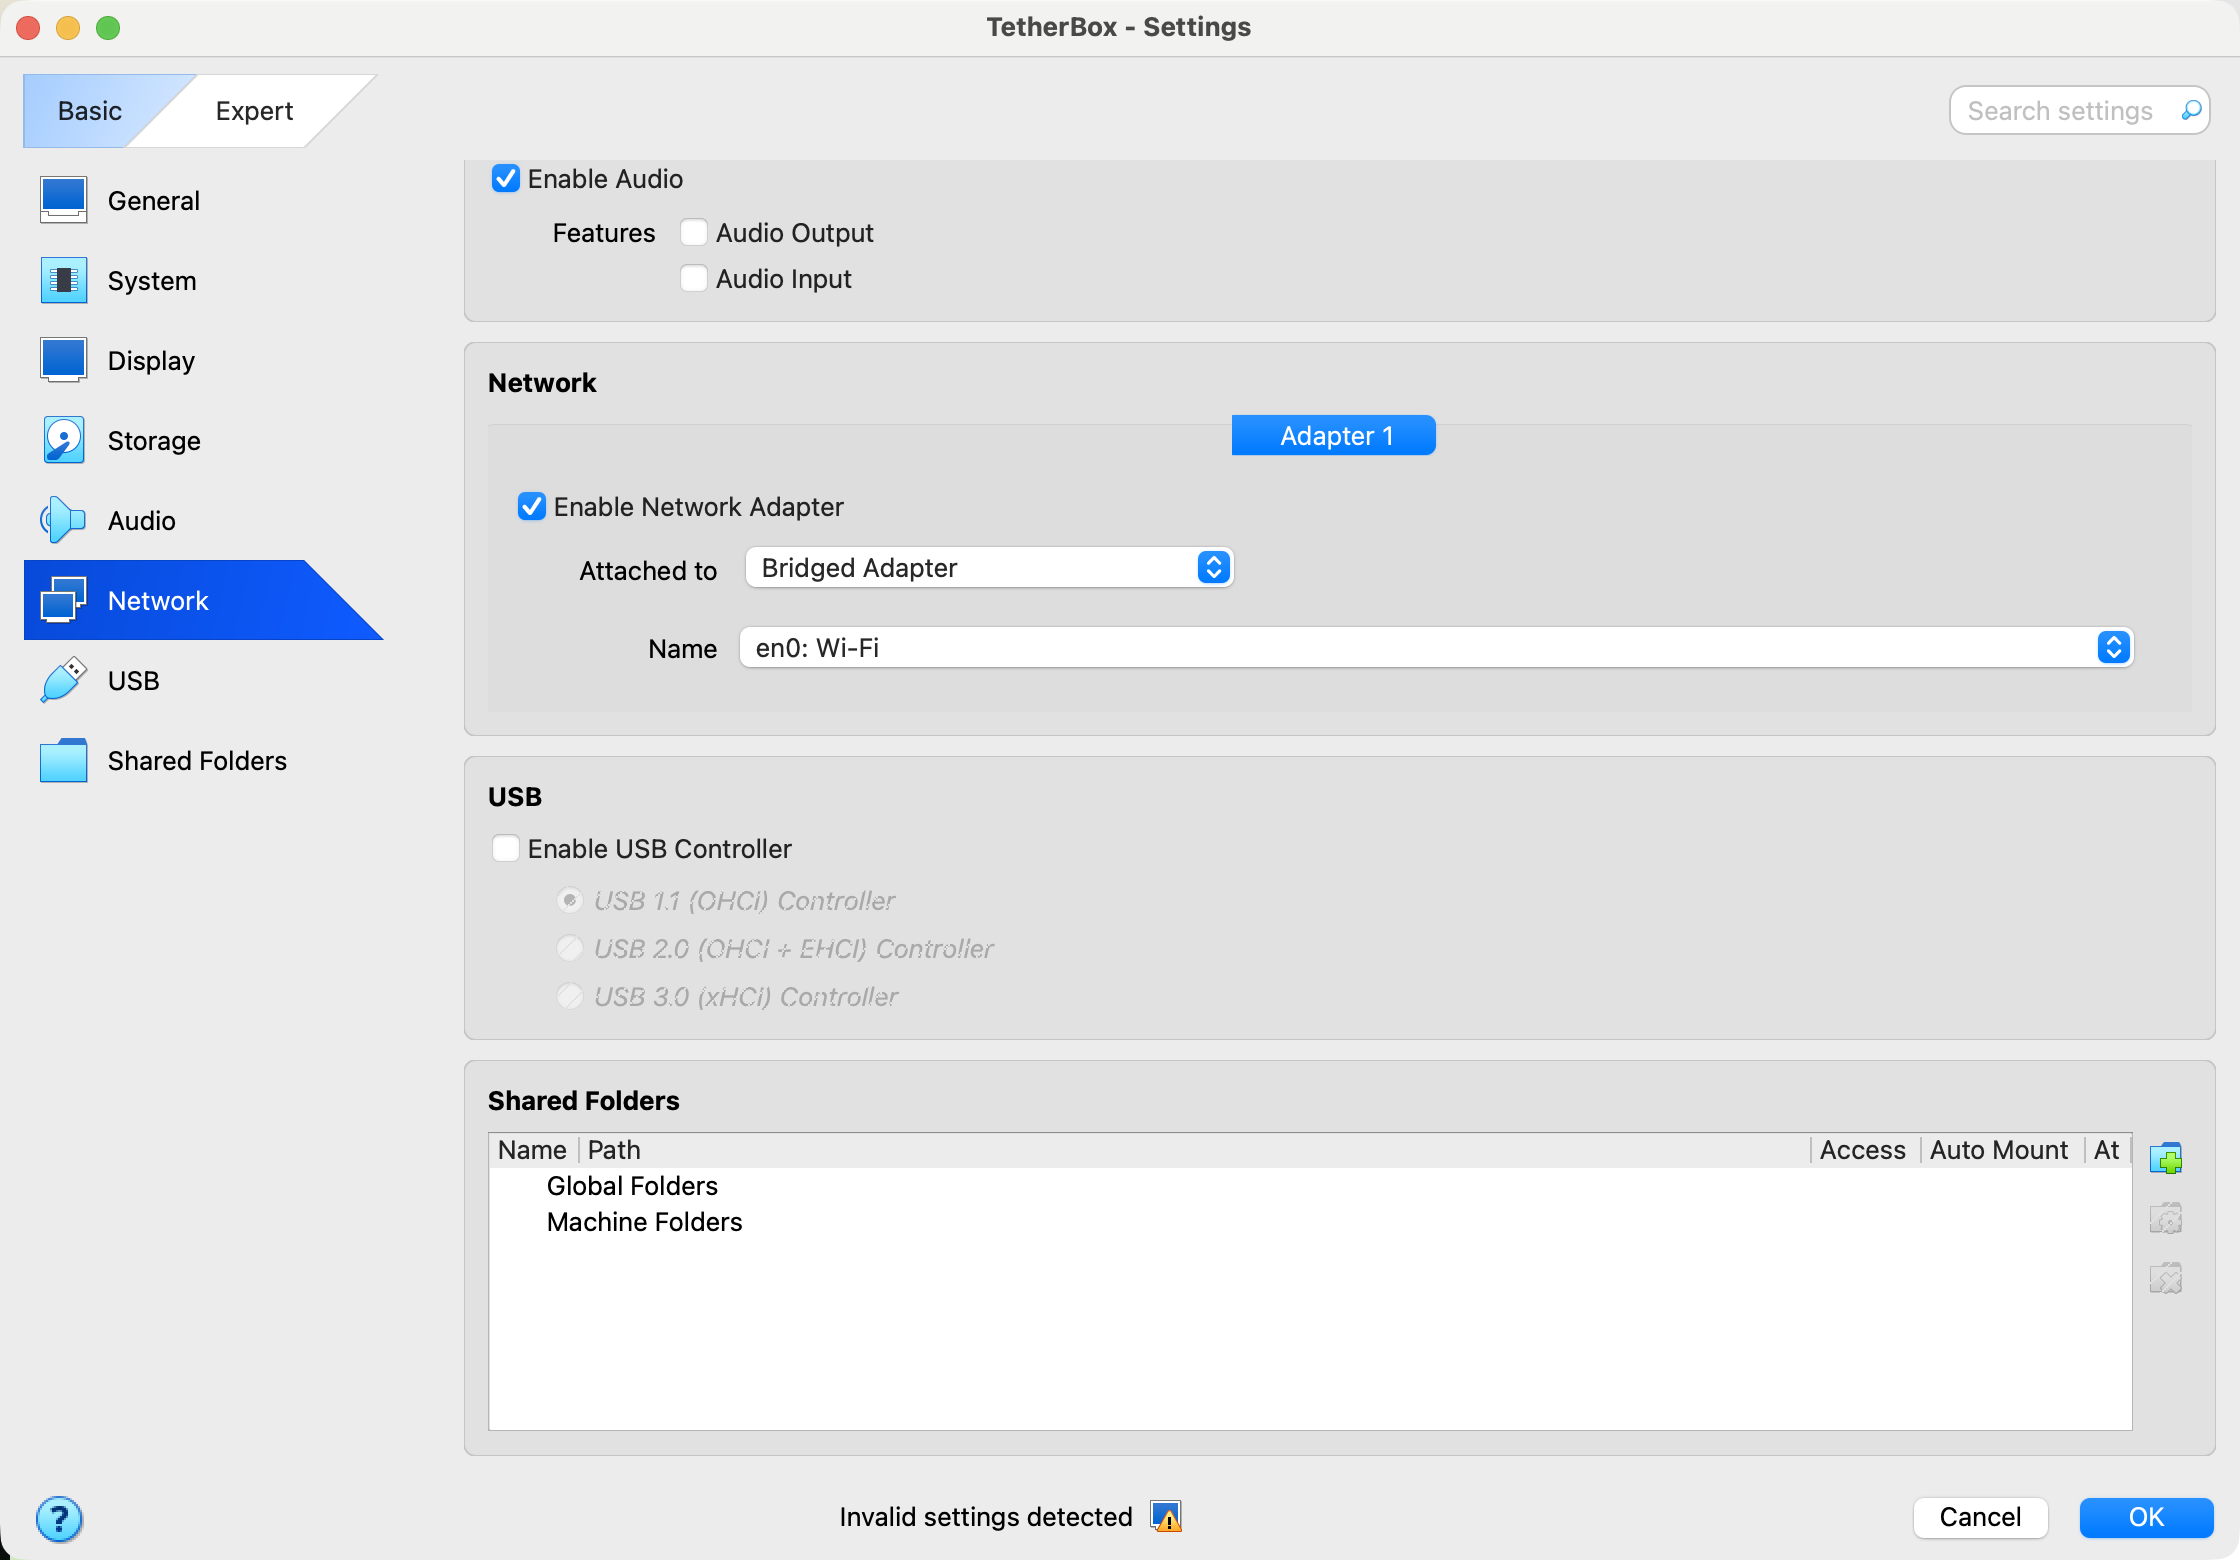
Use a wired connection. Bridged mode is unreliable over Wi-Fi, many wireless adapters and access points block the bridging it relies on. If the host has an Ethernet port, bridge onto that. If the VM later fails to start with a "nonexistent host networking interface" error, the bridged adapter you picked is no longer present (for example the cable was unplugged or the NIC changed), reopen Network settings and select a valid adapter.
4. Add a Disk for Recordings
The appliance's built-in disk is only large enough for the operating system. To record video you must add a second virtual disk. The TetherBox detects a blank disk on its own and partitions, formats, and mounts it automatically, you do not need to format anything yourself.
Two requirements matter:
- The disk must be at least 128 GB. Smaller disks are ignored by the auto-mount process.
- The disk must be attached to the NVMe controller, not a SATA/AHCI controller. VirtualBox's SATA emulation can drop the disk offline under continuous recording load and corrupt it, so the appliance uses NVMe deliberately.
With the machine powered off:
- Select the TetherBox VM, then click Settings.
- Go to the Storage tab.
- Click the existing NVMe controller in the storage tree to select it. (If for any reason there is no NVMe controller, add one with the Add Controller button and choose NVMe.)
- Click Add Hard Disk on that controller.
- Choose Create, select VDI and Dynamically allocated, then set the size to 128 GB or larger.
- Finish, and confirm the new disk is listed under the NVMe controller.
- Click OK.
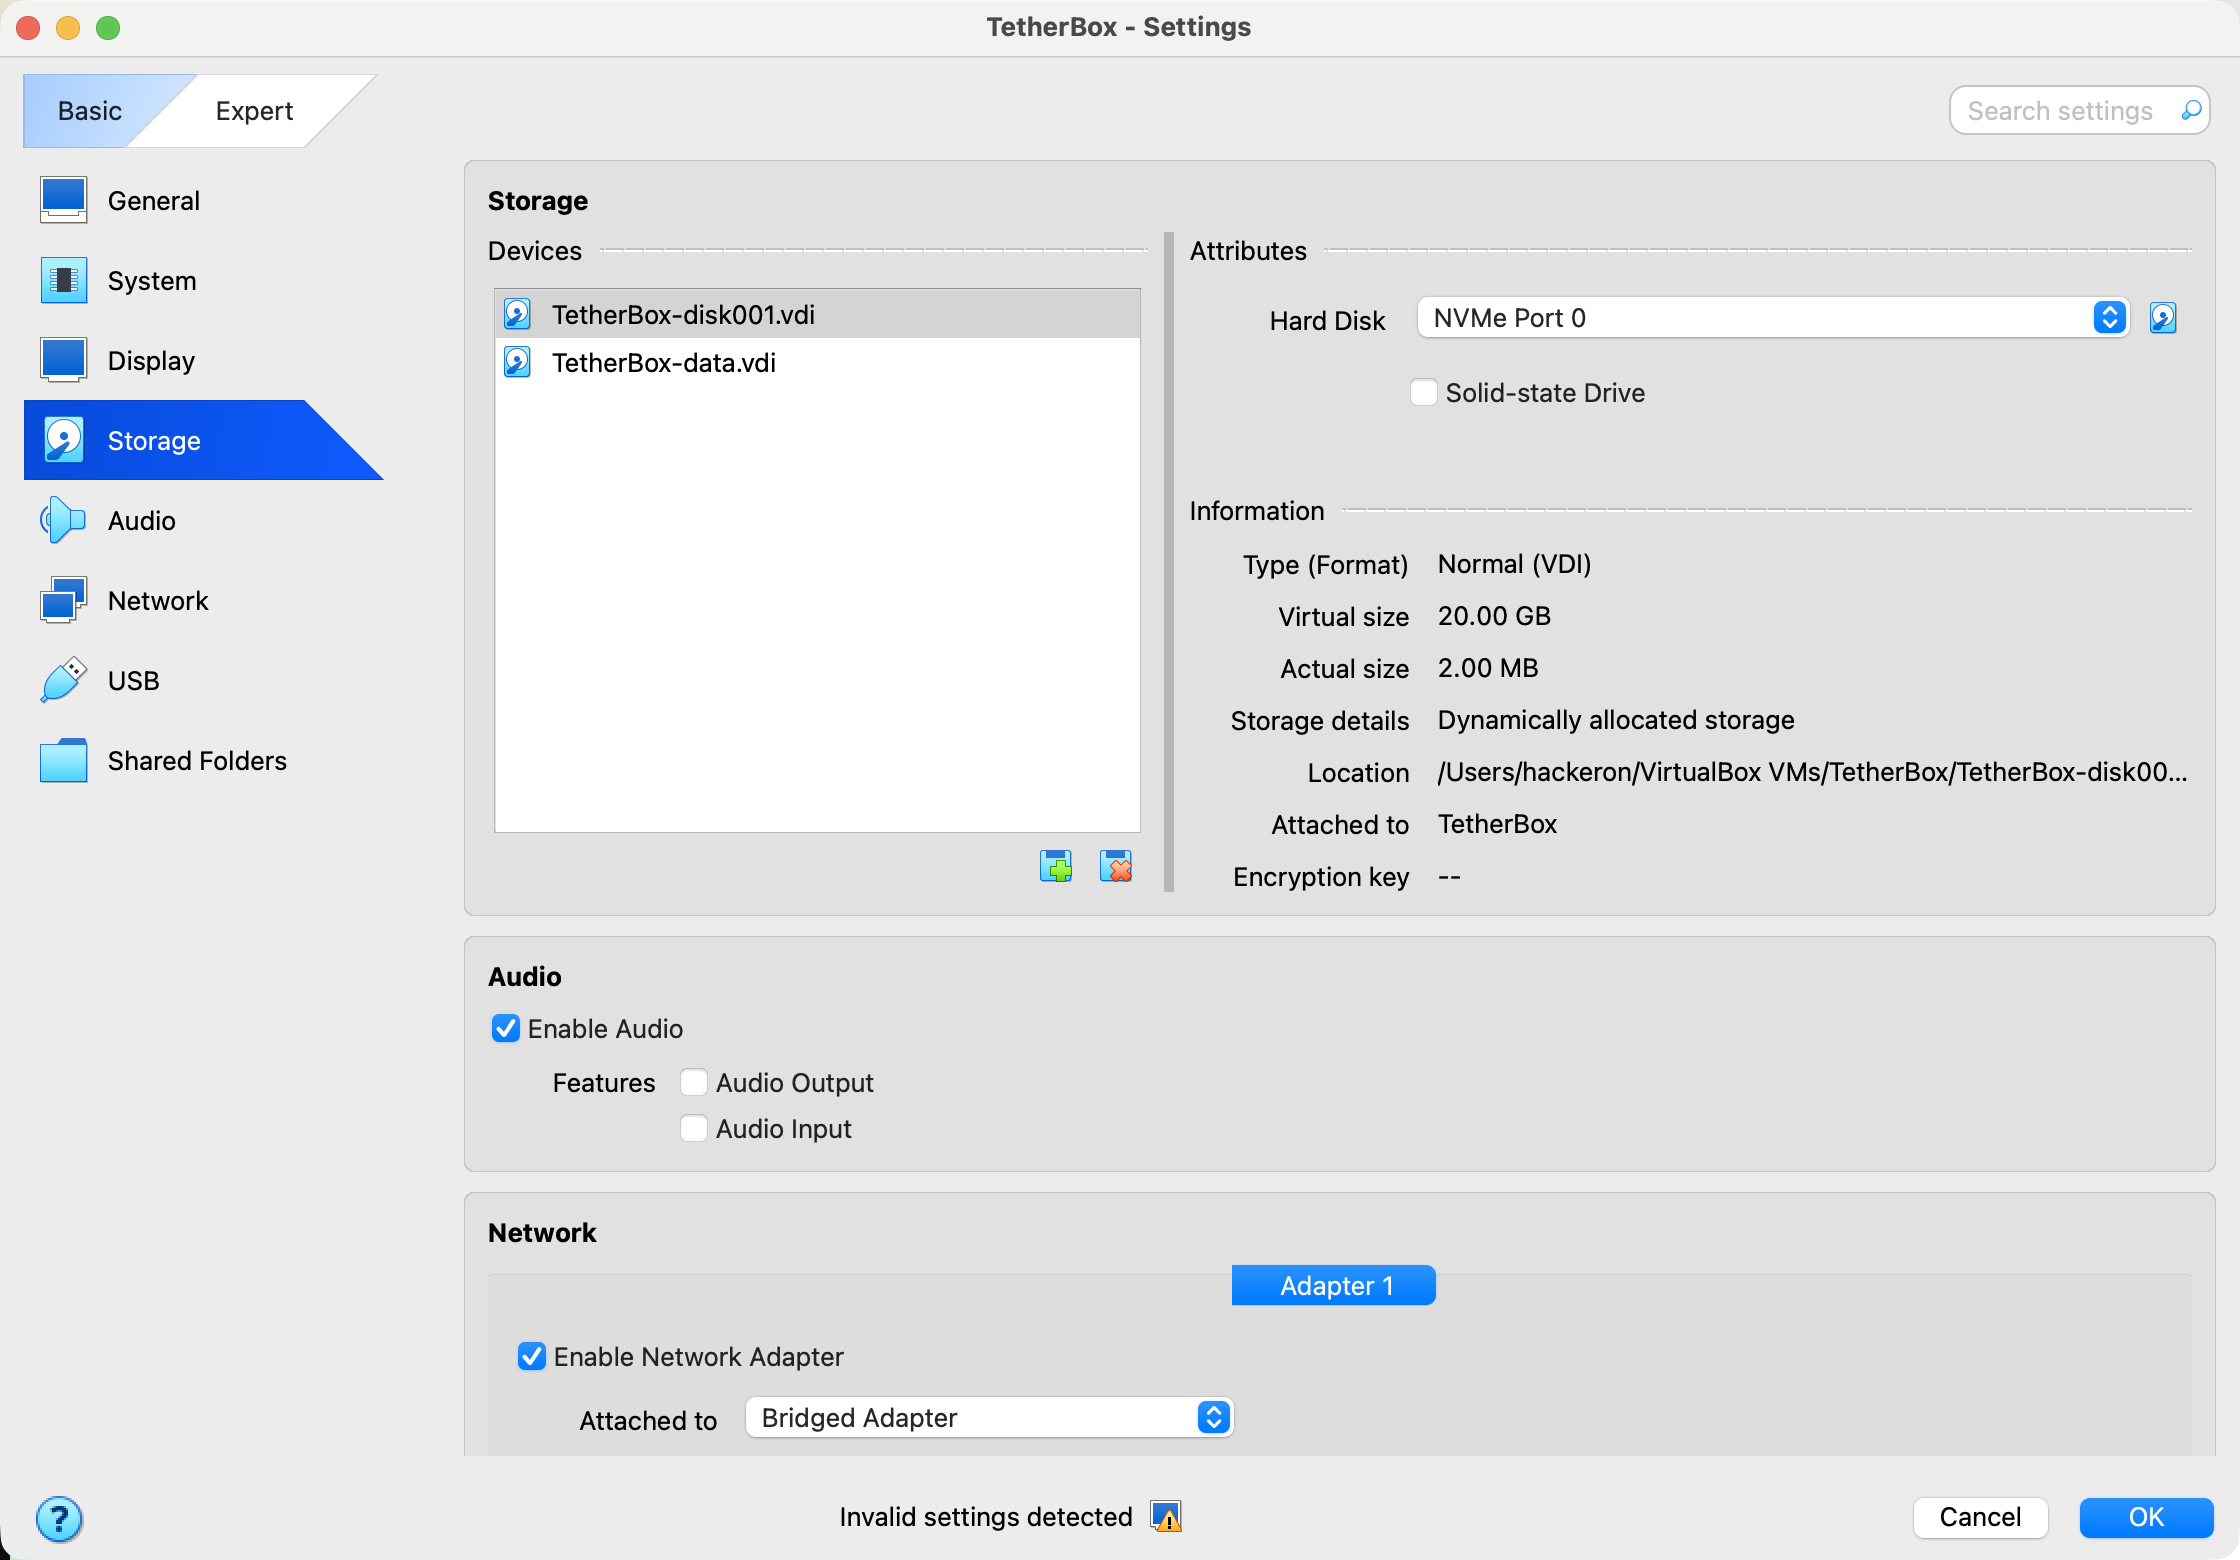
After the machine is running, the new disk is picked up on the next storage scan (within a few hours, or immediately on the next reboot), formatted, and mounted for recordings. No further action is needed.
5. Start the TetherBox
- Select the TetherBox VM and click Start.
- The machine boots and connects to the TetherX platform automatically.
- Follow Activating a TetherBox to claim the unit against your account.
Once online it behaves exactly like a physical TetherBox: add cameras, configure recording, and manage it from the platform. If it does not appear online, check that the bridged adapter is set to a live wired NIC and that the host has internet access. See Connecting your TetherBox to the Internet for connectivity troubleshooting and Storage Hardware Recommendations for sizing the recording disk.
Referenced in:

