Camera Setup Checklist
Please note every camera is slightly different, please find the nearest
equivalent value that applies to the camera you are using.
Network
Dynamic (easiest)
Set camera to DHCP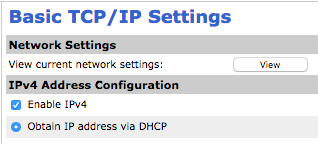
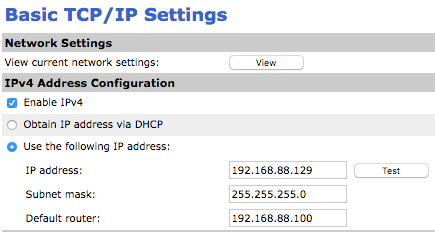
or Static (traditional)
Set camera to unused IP on 192.168.88.x networkset DNS/Gateway to 192.168.88.100
Video & Audio
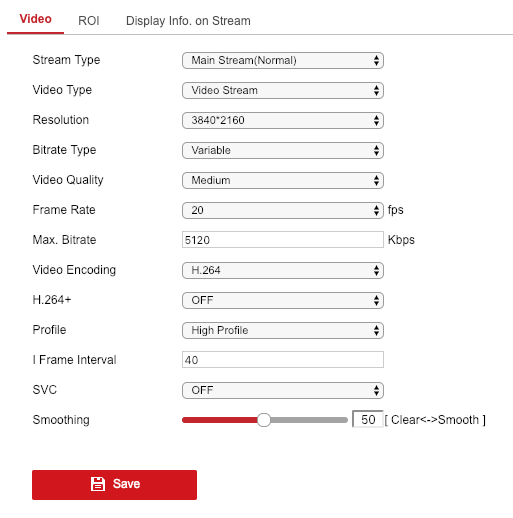
Recording Stream (primary)
- For 4K: H.264 4K 25FPS VBR - Quality: Medium - Type: Variable/VBR - Bitrate: 6144kbit - Key Internal: 50, No Watermark
- For 1080P: H.264 4K1080P 25FPS VBR - Quality: Medium - Type: Variable/VBR - Bitrate: 3072kbit - Key Internal: 50, No Watermark
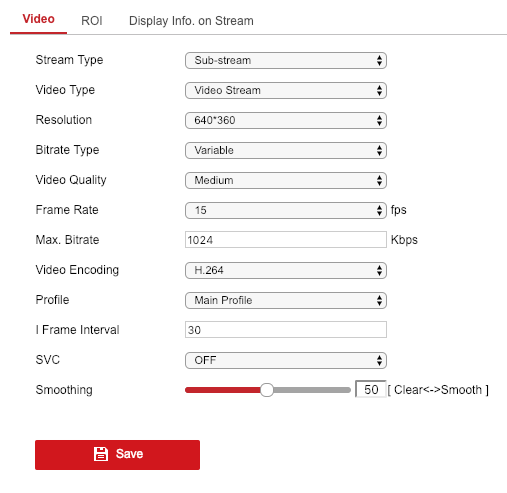
Analytics Stream (secondary)
- Recommended: H.264 D1 - 15FPS - Type: Variable/VBR - Quality: Medium - Bitrate: 1024kbit - Key Interval: 30
- The analytics stream is used to detect the objects vs background, please ensure this is 720P or below.
Conditions
- Anti Flicker: 50z
- BLC: WDR - Middle
Audio (optional)
- Sampling Rate 16K
- Enable Main/Sub Stream
- Encode Mode: G.711A
Date & Time
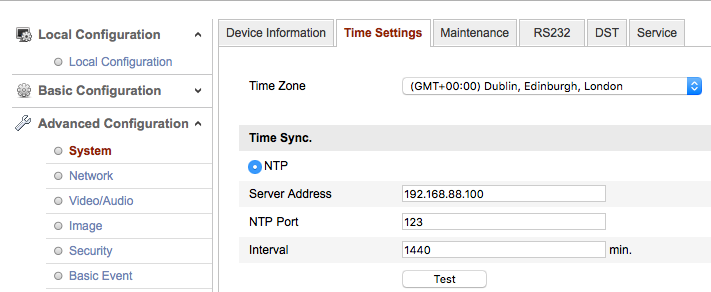
One option is to disable time from being displayed in the camera at all. You generally do this under OSD settings. If you do wish time to be displayed in the image, you need to set the following:
- Usually under Basic/System -> General -> Date & Time
- NTP Server: Set to TetherBox IP address (usually 192.168.88.100)
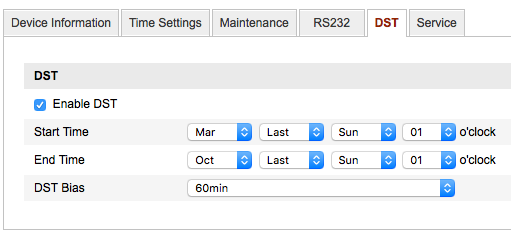
- DST: Set appropriate settings for your Timezone.
- e.g. British Summer Time begins at 01:00 GMT on the last Sunday of March and ends at 01:00 GMT (02:00 BST) on the last Sunday of October
